Showing posts with label rubber seal. Show all posts

Monday, May 13, 2013

Re-caulking, Gluing, Sealing, Screwing: Mind at Ease!

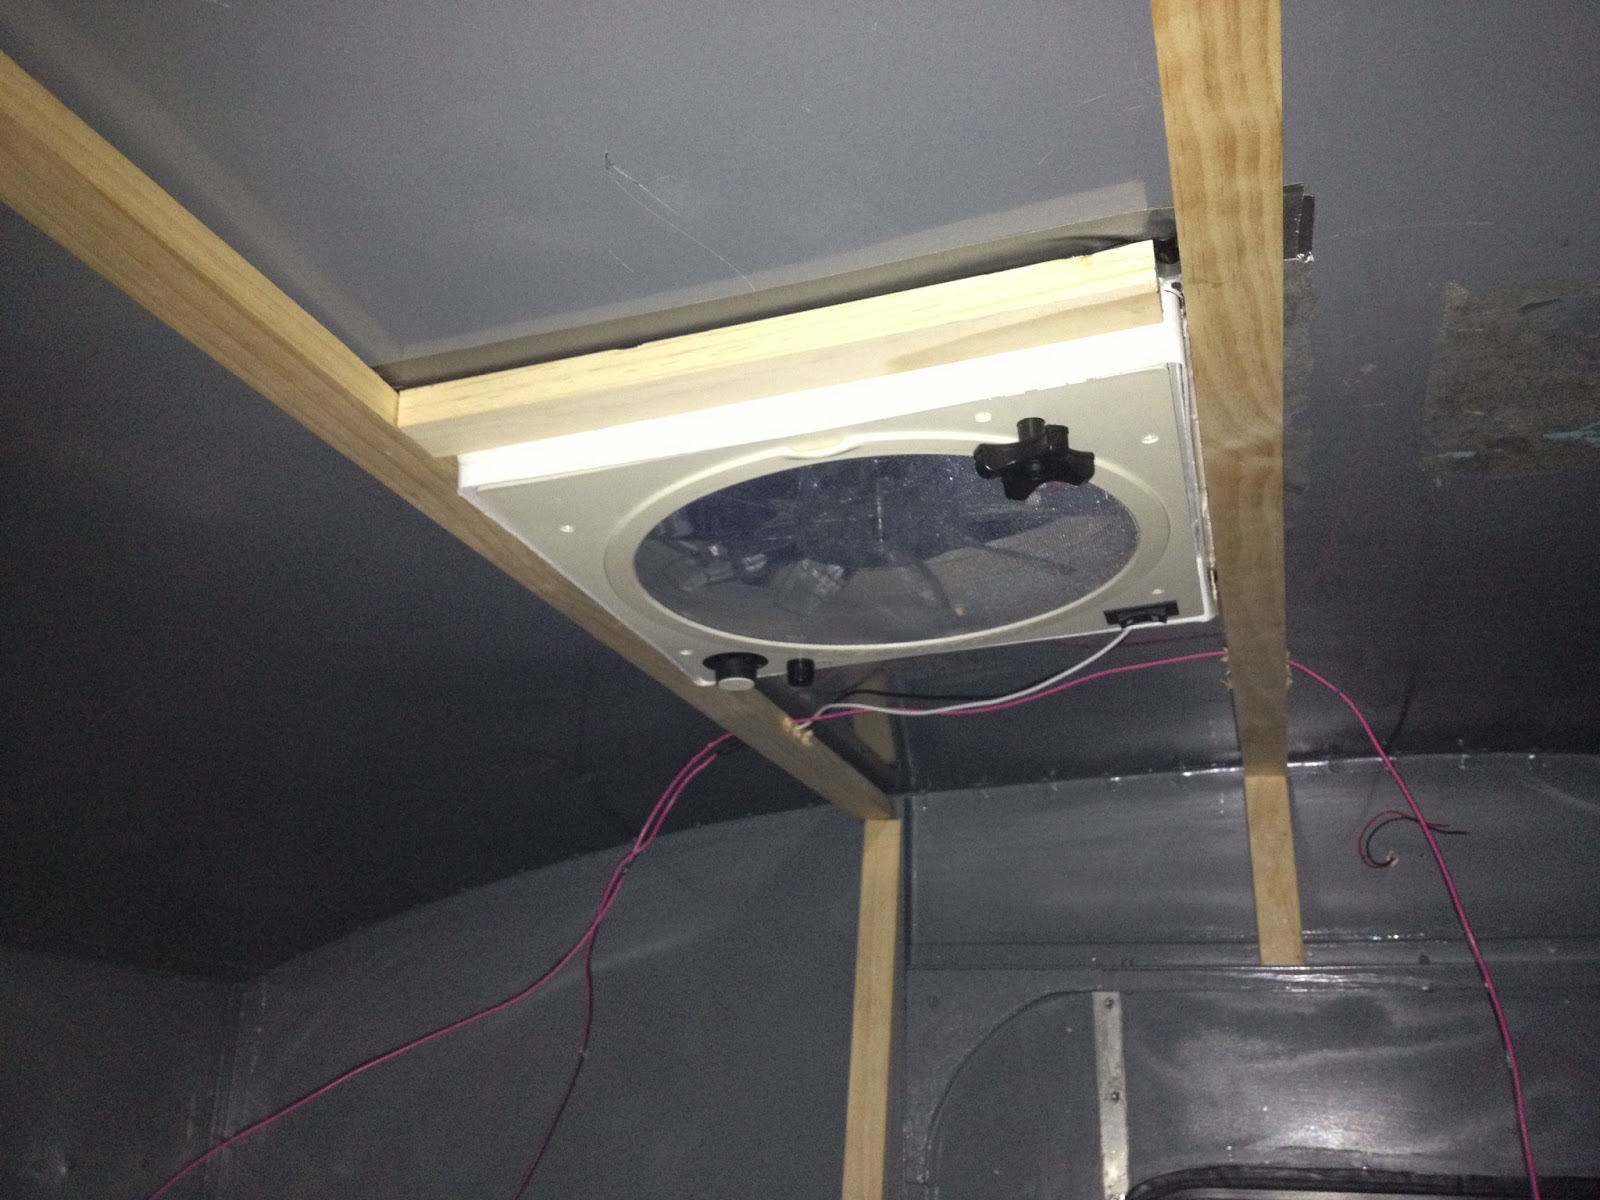
Ended up having an hour this evening to deal with my concerns about leaking. I was able to take off the wood strips I had screwed into the ceiling.  I caulked the area where the fan rests against the roof. Then I added butyl tape between the roof and the wood braces. I was able to remove the screws that had the heads broken off and put in new screws. The whole thing is drying right now. I feel much better about the fan now!


 Butyl tape and caulk applied.  Braces re-installed.


 The Fantastic Fan is now completely sealed!


Storage boxes caulked and sealed.

I also used some backer rod to cover some of my imperfections in the floor storage boxes. The  I re-caulked the gaps in the storage boxes. The last step will be to carpet the bottoms to give a little cushion and stop rattling when on the road.


 I was able to re-glue the dome light in place.  I couldn't get all the paint off the bottom of the foam, so I decided to 'over glue.'  I'm hopeful that it makes a clean seal.  I should add for those of you who are curious, I will be insulating the 'entire' ceiling with the same foam panels.  I only added these small sections because I needed to be able to work with the wires.  Eventually the entire teardrop will be insulated and covered with the headliner.


The last project I was able to finish tonight was to put the weather stripping on the door frame.  The weather stripping was exactly the right size and fit the groove where the door rests against the wood frame.


You can see how it fits snugly against the door frame.


If you look very carefully, you can see that I added a thin gray rubber seal to the door as well.  This is way more protection than the original design.  I'm hopeful that the two parts will fuse to the metal or wood and make a tight and waterproof seal.

Next job:  getting it out of the garage.  At least now I can put it out there and not be concerned about water getting in!  

Just forgot, I still need to seal the bulkhead floor.  I keep forgetting about that because it is hard to see.  I'll try to do that tomorrow evening.  Forgot another: I need to install the rubber membrane over the hinge on the hatch.  Hopefully I can find a really wide bike tube tonight.  One more thing I would like to try to accomplish before putting the drawers and cabinets in place:   I think it would be smart to hang the spare tire from the 'floor' of the galley area where the cooler 'side' will be.  I'll use rubber washers on the bolts to keep water from penetrating through the floor.  That way it is out of the way and fairly easy to access should I blow a tire and need to get it.  Of course, by planning ahead like that, you know that my first flat will be in the middle of a snow or rain storm!

Wednesday, May 1, 2013

Hinge Solutions

Thanks to the incredible support group on the Teardrops and Tiny Trailers Website:  http://www.tnttt.com/ I think I've worked out how I am planning to replace the hinge gasket on the Carpe Diem.  It seems the best way to 'seal' the hinge is a two-fold approach.  First, I'll use butyl tape under the hinge.  Then I'll add a rubber gasket over the hinge, which will be held in place by two strips of aluminum.  The strips of aluminum will be anchored above and below the hinge and will help all the water to 'run off' the hinge.


You can see from the photo above how the 'finished' hinge will look.  The teardrop above, has the rubber gasket over the piano hinge.  This is the exact same set up I will be using.  By the way, that is one sweet looking teardrop isn't it?

Dreaming of My Teardrop

I love the way my mind works.  Even though I'm super busy this week and won't have much time, if any, to work on the Carpe Diem, my mind has been hard at work solving some of my design 'problems.'

Problem One:  How to make the 'seams' where the wall and 'floor,' which are covered in insulation and headliner, come together in a way that looks finished.  I found a soft rubber that has a slight bend to it.  It is originally designed for the bottom of a garage door, but I think, with the right glue, it will fit perfectly along the seams.  This will also be a great way to cover the machine screw/bolts that hold the plywood floor to the walls of the teardrop.  Here is what the material looks like.

This also 'solves' another problem I had; my mattress is not going to 'perfectly' fit the width of the teardrop.  I would have had a problem with the heads of the screw/bolts.  I could imagine them scratching fingers or hands and being cold in colder months.  This will cover them and provide a tiny amount of cushion as well.

Problem Two:  How to insulate the doors and still maintain the integrity of the hinge mechanisms. The way my teardrop is designed, the hinges, which are brass, are mounted directly on the inside of the teardrop and to the door.  Because they are bolted in both positions, they are firm and very sturdy.  I wanted to add insulation for two reasons.  One: it would make the 'wall' when the doors were shut, the same 'thickness.'  Two: it would allow me to cover the whole door with the headliner to give the edges a finished look.  I'm working to make the inside of the teardrop look like it was made that way intentionally, not just thrown together in a make-shift fashion.

My solution; cut pieces of plywood to mount to the door and the wall which will bring the thickness of both the door and wall to the same thickness as the 1" insulation panels.  Then, I can simply cover the plywood at the same time I finish the foam core.  I'll then bolt through both the wood and the covering of headliner.  The hinge will then be visible, but will be solid.  The gray that I've painted the interior skin will compliment the subtle charcoal gray of the headliner.


Now, back to my regularly scheduled, busy work week!  My mind will be running in the background.  Next problem to mentally work on:  how best to construct the galley cabinets to allow for a power center with my fuse box and how to create a pull out drawer for the cooking stove...

Wednesday, April 17, 2013

Windows

Well,  I've made a cardboard template of the cut out for the window.  I discovered another thing last night as I was meticulously examining the door; I realized that the aluminum angle that was used to screw in the screen windows of the original design, are riveted to the door panel.  This is good news because I can easily remove the rivets, trim the angle pieces and then re-install either with bolts or possibly rivets.  I have not found a solution yet for the larger rivet holes.  I don't own a pneumatic rivet gun so I'm looking into other alternatives.


The above image is before I re-painted the door.


Now all I need is some time and a very good saw blade.  I'm hopeful that I might be able to cut out the window openings tonight and rough fit the windows into place.  It should go pretty smoothly.  NOTE:  Way too tired to attempt this feat!  Will have to try another day. 

Interestingly, the template proved to me that the top and bottom portion, or the horizontal section, is exactly the right size.  The area that needs to be altered is the radii and the width.  If I take it nice and slow, things should go very well.

Installing these windows marks a commitment to the project; there's no going back after this.  If I screw it up, there are not extra 1947 Tourette Travel Trailer doors just laying around.  It has to be done right.  The only other thing that makes me this nervous is cutting a hole in the roof of the teardrop to install the ventilation fan.  That is going to really freak me out!

Monday, April 15, 2013

Galley Animation and Windows!

So, this was fun.  I was able to make this sketch up design in about an hour today.  It's not exactly to scale, but its a lot easier than monkeying around with pieces of wood in the garage.  I was able to experiment with different size cabinets, counter tops, etc.  I'm so glad that I took the time to learn how to use this tool!  Unfortunately, the 'actual' measurements are a little tighter than the model I made here.  I'm trying to find a way to store our Coleman stove during transport and make an elegant way to use it when in camp.  I'm leaning toward a side table that will allow us to use the stove.


Galley Design One from Todd Burleson on Vimeo.

My windows arrived today.  They look pretty spiffy.  


I am going to have to do some cutting of the door to make them fit, but I think it's going to work out great.  I'm a little anxious about cutting the door; it has an aluminum 'L' piece that I'll need to trim in order to make these fit just right.  It's time to invest in a few good quality metal scroll saw blades!  However, I'm so happy that the rubber seal will cover the holes for the hinges that the previous owner cut into the aluminum!  This is the door that I still have to remove all the rust spots.