Showing posts with label caulk. Show all posts

Wednesday, July 31, 2013

Finally Sealed Up Properly?

It's the eve of my next trip; a journey to Starved Rock State Park with my son. I think I've finally gotten the teardrop sealed up the way it should be. First, I let all the caulk we applied in Ohio dry. Then I tested it with a jet of water directed at the entire under side of the teardrop. I found two small areas where water was sneaking in. I re-sealed those areas again with more caulk and then applied another layer over the entire area where the gap was. Finally, today, I applied a rubber membrane (aka inner tube) to the edges.


I applied more adhesive to the rubber to 'seal' it in and then lastly I put the linoleum in place. The rubber, when the adhesive fully cures, will keep the moisture from penetrating the seam. We are planning on pulling out pretty early in the morning and then a full day of hiking and exploring tomorrow at the park. I'm excited!

Friday, July 26, 2013

I'm Back in the Game!

Two weeks ago today I had my second Carpal Tunnel surgery.  I met with my doctor yesterday to have my stitches removed.  All looks good and I'm already feeling the relief.

 Stitches out.  

It's amazing to think that a small probe was inserted in the incision and basically they hollowed out the tunnel that the nerves move through; the purple dots are the farthest point that the 'probe' was extended into my hand.  I have so much empathy for people who have had intense surgery.  Mine was incredibly minor and it took a lot out of me.  The biggest thing I missed: showering with both hands!  When I washed my hair and shaved today it was wonderful to use both hands. 

The teardrop sat under our pop up cover for the past two weeks.  I was able to get in and check to see that the caulk had set up properly and that everything was dry.  I used a jet nozzle on the hose to try to pinpoint the leak in the cabin.  It ended up being a tiny spot under the bulkhead and one of the screw holes.  Now that it is all dried out again, I'll be able to touch up those tiny spots.  I'm going to, just for good measure, caulk underneath as well.  I'm going to use some caulk that is designed for roofing applications.  It's black and will blend in well with the frame.  Once we are sure all is sealed up, I can put the linoleum and mattress back in place.

I will need to wait for the rock guard to dry.  Of course, we had the pop up in place for two weeks; no rain.  Take it down; rain.  I didn't get the aluminum strip glued in place yet; hopefully a dry evening will allow the rock guard to dry.  Then, a few minor fixes in the interior and we will be ready for our next road trip.  We are planning a family get away to Starved Rock State Park soon.  We've heard a lot about it, but never made it there.  This will be our first time with the kids too!


Monday, July 8, 2013

Change of Plans...

Well, the best laid plans of mice and men...we ended up with some problems this morning.  We went out to check on the teardrop's cabin.  It had rained seriously hard overnight and was down pouring  as we ate breakfast.  Unfortunately, the caulk had reacted with the intense humidity and heat.  The caulk, which is pretty thick, began to liquify and was not solidifying like we had hoped it would.  We knew we would not be able to put the mattress in as it was.  We tried backing up the CRV and putting the teardrop in the garage, but it was just way too tough to maneuver with the basket on the front of the teardrop; it impacted the turning radius in a big way.  We gave up after a few minutes of trying and being completely soaked by the rain while we tried.

We decided to go ahead and take the kids to my parents to visit and we would stop at Harbor Freight on the way back and get some of the things we would need.  The first thing we bought was a 12" extension to the trailer tongue.  After buying a coupler lock, a new pin and a few other supplies we headed back to Powell.

Putting the extension on the tongue made a HUGE difference!  I was able, with some support from Erica, to back the teardrop into the garage quite easily.  I can't believe I didn't buy that thing before!  After getting the teardrop in the garage, we plugged in two fans and started airing the interior out and charging the batteries.


Installing the extension was simple; just insert a new coupler pin.  


Drying out in Powell.


Two fans drying the caulk.

We've decided that we would stay the night here while the cabin dries out and the caulk cures.  We hopefully will be able to load up in the morning and head to Athens.

Just an aside, I noticed some water in the galley area too.  I'm not sure what the cause of that is, but it has to be partly due to the poor seal and fit of the hatch.  That's not nearly as important to me as the cabin is, but it will have to be addressed when we get home.  For now, we wait and pray for no rain.


Sunday, July 7, 2013

Mid-Trip Reassessment

We headed south from Sugar Island, Michigan, and as we did, we were met with lots and lots of heavy rain.  The Carpe Diem pulled well; we ended up taking two lane freeways the last half.  Our destination was Columbus where we were staying the night with Erica's brother and family.  We woke up this morning and went out to grab some laundry to wash and found a very unwelcome development...


The marine fabric that was on top of the floor in the bed area of the teardrop.

The first thing I noticed was that the bedspread was wet.   Upon further inspection, I saw that not only was the bedspread wet, the mattress cover was completely soaked.  I pulled the bedspread out and soon saw that under the mattress the marine fabric was also completely soaked.  


The foam of our mattress.

After pulling out the mattress and the marine fabric, I found the problem.  We knew that there was a small problem with the floor under the doors.  There seems to be some kind of bowing of the plywood floor that pulls it away from the metal frame of the walls.  I had jacked the frame up earlier and then bolted through the bowed wood before I caulked and weatherproofed the side walls.  Over time, the bolts pulled out of the wood and the 'gap' opened again.  Unfortunately, the rains penetrated the gap and the marine fabric and the mattress pad simply absorbed and wicked the moisture up from the bottom of the floor.


After removing the marine fabric from the floor.


The gap, look at the space between the silver sheet metal screw and the black wood floor.

I went to Menard's and picked up several tubes of caulk, some backer rod and a remnant of linoleum and necessary adhesives.  I've decided that the marine fabric is not the best material to use for my flooring.  Of course, I kind of knew this, but I didn't see a 'need' to do so until now.  Thankfully, I was able to purchase a small remnant that will fit very well for our use.  

I removed the old caulk and backer rod.  Then, I added a layer of caulk in the gap and then inserted the backer rod into it.  After an hour or so, I added another layer of caulk and some more backer rod.  In all, I probably have an inch of 'caulk' in the gap with the backer rod.  I am planning to cut the linoleum a little wider than the flooring so that I can use it to bridge the gap in the frame/floor.  I am hopeful that the linoleum will protect the mattress from any moisture that might possibly get in.  I can't imagine that any moisture will make it through the incredible amount of material I put in there today, but you never know.


The aluminum flashing at the top of the neoprene rubber rock guard needed to be re-glued today.

Somehow, quite miraculously, the small piece of aluminum that is at the top of the neoprene came unglued and landed in the basket.  So, since I was caulking, I cleaned up the area and re-glued the piece of aluminum.  We are hopeful that this will prevent any water from seeping down under the neoprene layer.  


The linoleum remnant has a wood grain look.  I cut it a little wider than the mattress to allow for some overlap of the metal.


Looking at the linoleum in this view, it makes me think about the storage boxes on the floor; it would have been slick to have the linoleum down to create a water-tight layer.  


The linoleum cut very easily with a razor knife.


I used a straight edge to cut the 'lids' to the storage boxes.  For now, I'm just going to leave the marine fabric on the 'lids.'  I will switch them out when we get home.


I think it looks pretty nice!

My next step was to add yet another layer of caulk to the edges.  I pulled up the linoleum along the edges to let the caulk dry overnight.  Like I said, I'll replace the marine fabric on the lids when we get home.  I am thinking about not using the adhesive that is usually used in a household application.  I think the heavy duty contact cement should be just fine. 

While we were on the first couple of legs of our journey, we made a list of 'additions' or improvements we wanted to make to the Carpe Diem.  Some of them are practical, some of them are creature comforts, some of them are fun things to do.  Here is the list up to now:

  1. Add hat hooks (possibly use velcro to hold the hooks).
  2. Make a square 'key' for locking the locks inside the cabin.
  3. Come up with some kind of system for pulling up the triangle brace.
  4. Velcro corners on the curtains
  5. File down bolts on the door locks.
  6. Re-do the driver side door lock (not matching up properly).
  7. Glue driver side cup holder back in place.
  8. Side table or folding table to hold stove and a space to work and prepare meals.
  9. Fresh scent for inside the cabin (lavender oil or air freshener?)
  10. Remove and vacum the vent screen and window screens.
  11. Cover the door hinges in the same rubber used on doors.
  12. Trivet for putting hot pots while cooking.
  13. Add tea and sugar to our supplies; both regular and decaf.
  14. Spoon rest for cooking.
  15. Salt.
  16. Clorox wipes.
  17. New Stove (propane; our Coleman is not optimum for cooking).
  18. Propane (we saw someone who kept their propane tank in a milk crate for ease of moving it around and being able to lash it to the cargo basket).
  19. 12" extension for the tow tongue (We learned that the cargo basket cuts down on our turning radius an awful lot!)
  20. Crock Pot: if there is 120 volt power we could use it to cook a meal while we are away, or if needed we could use the inverter in the cabin.
  21. Crossword puzzles/word finds.
  22. Mancala Game.
  23. Cribbage (we want to learn how to play.)
  24. Cards
  25. Electrical Tape
  26. Duct Tape
  27. Random electrical connectors.
  28. Screwdrivers
  29. WD-40
  30. Carabiners (the two 'hooks' we used to hold the chains in place were bent and broken during travel.)
  31. Fly Rod and associated gear.
  32. Assorted Rubbermaid containers to store food in the cooler and prevent it from becoming contaminated from water, etc.  Also to put ice in to help ice last longer.
Just a 'few' things to add to the Carpe Diem!


We are planning to head south tomorrow morning to drop our children off with their other grandparents for a few days.  Erica and I are going to revisit our College Alma Mater, Ohio University.  We haven't been there together in over 15 years.  We look forward to spending some time in the place where we fell in love.  


Wednesday, May 15, 2013

Current Project List: Galley and Electrical

I'm finding it helpful to articulate what needs to be done in writing so that my mind is clear.  I'm a list guy.  I have lists all over my desk, on my iPhone, even in my car.  I have a special pad that I keep in the car for my commute; I almost always hear something on NPR or think of something I want to do when I get home.  My iPhone list for the teardrop is long, but it has been really helpful.  It helps me keep me from forgetting things.


At this point, with the exception of the bulk head floor and the rubber gasket over the piano hinge, the teardrop is essentially water tight.

Here is a list of projects that remain in order to 'finish' the galley and electric:

1.  Hinge gasket and aluminum strips to hold it in place.

(I stopped by the local bike store South Port Rigging to 'buy' another tube for this purpose.  I ended up trying to explain what I needed and why, to the owner.  He promptly went back into the tube trash and found me a huge inner tube and he gave it to me!  No cost.  Well, I wish I had seen him a couple of weeks ago.  Nonetheless, that was really nice of him!


2.  Caulk bulkhead floor.

3.  Finish trim on galley cabinets, drawers and doors.

4.  Mount spare tire under cooler slide.

5.  Install LED 'night lights.' These will be mounted on an 'L' bracket, which will be bolted to the frame.  Should be pretty cool at night!  Also going to use my extra 'porch lights' under each door. 

6.  Install running lights and tail/turn signals.

7.  Finalize all electrical runs and install fuse box.

(Saw this image on another teardrop build; I like the use of aluminum around the switches.  I may have to incorporate that into my 'switches' or on the battery meter.


8.  Paint/polyurethane galley cabinets.  Thinking I may use the brown paint from the basement project as an accent color.  Might just paint the drawer fronts and the cabinet trim brown. 

9.  Install hardware on doors and drawers.

That should cover the galley and electrical area.  From there we'll move to the cabin cabinets and interior insulation and fixtures.  


Monday, May 13, 2013

Re-caulking, Gluing, Sealing, Screwing: Mind at Ease!

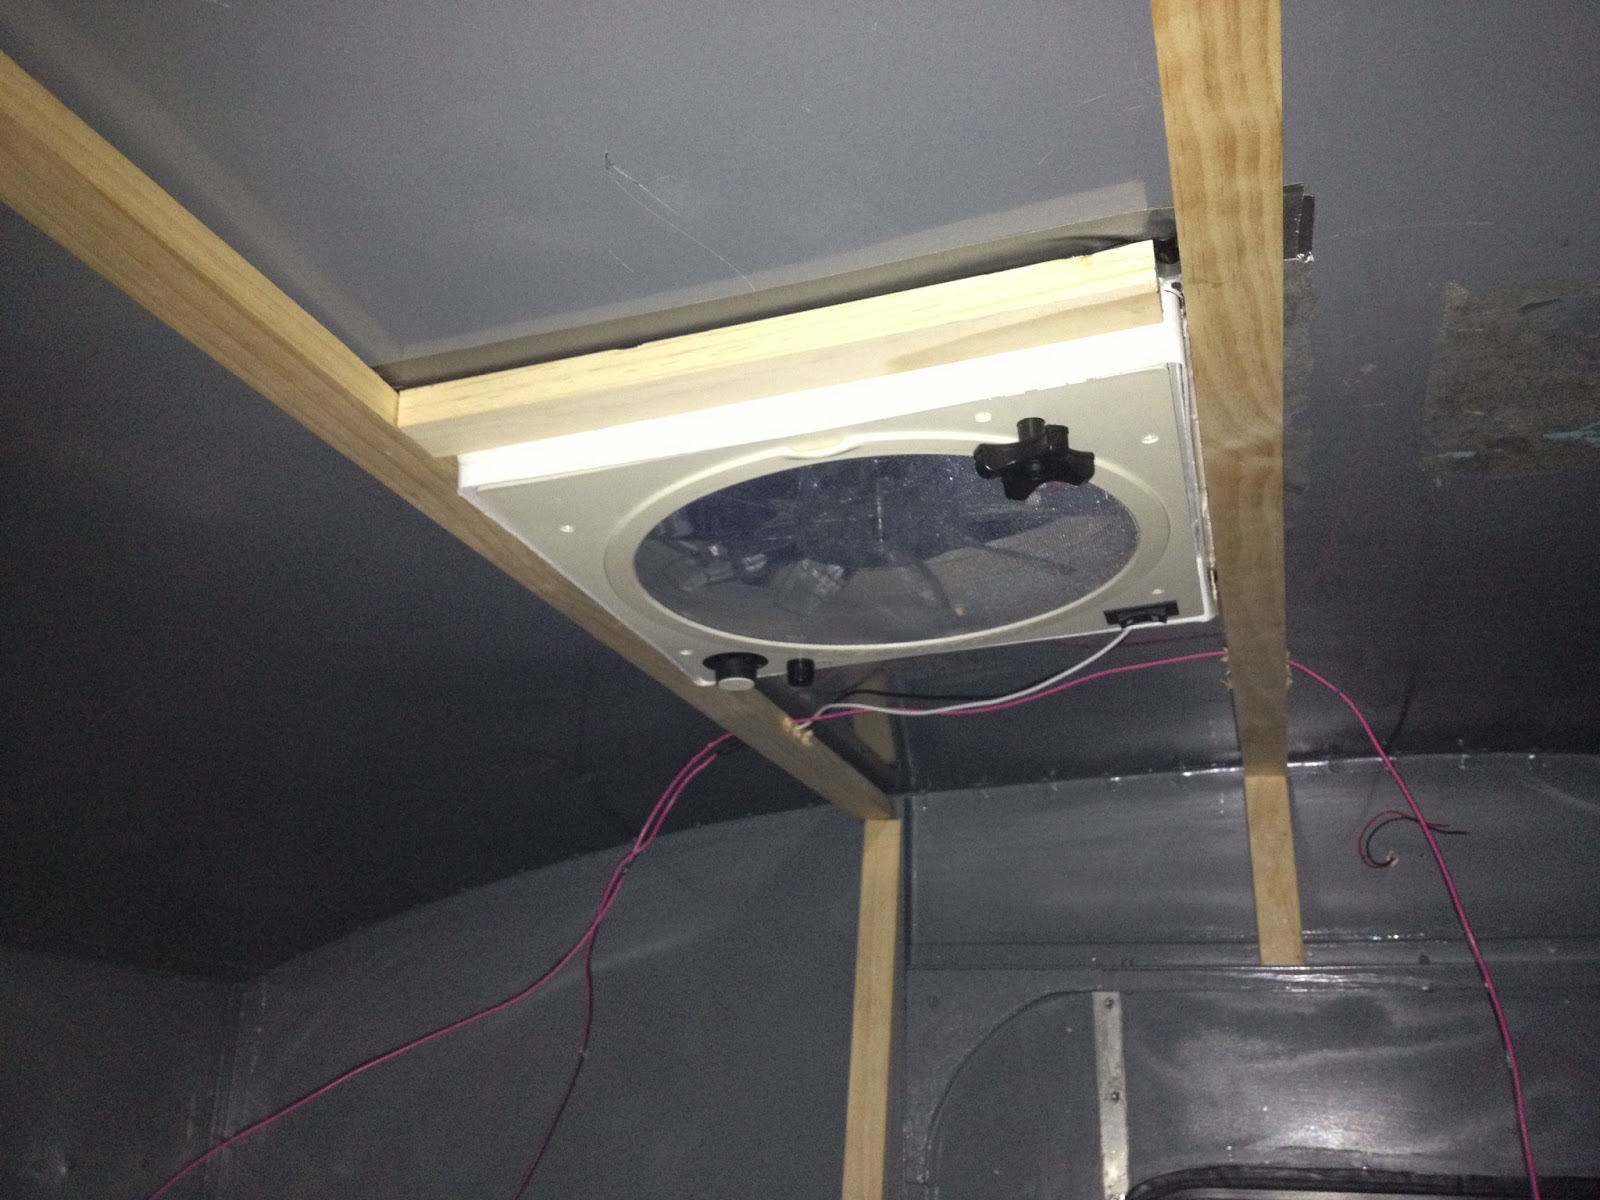
Ended up having an hour this evening to deal with my concerns about leaking. I was able to take off the wood strips I had screwed into the ceiling.  I caulked the area where the fan rests against the roof. Then I added butyl tape between the roof and the wood braces. I was able to remove the screws that had the heads broken off and put in new screws. The whole thing is drying right now. I feel much better about the fan now!


 Butyl tape and caulk applied.  Braces re-installed.


 The Fantastic Fan is now completely sealed!


Storage boxes caulked and sealed.

I also used some backer rod to cover some of my imperfections in the floor storage boxes. The  I re-caulked the gaps in the storage boxes. The last step will be to carpet the bottoms to give a little cushion and stop rattling when on the road.


 I was able to re-glue the dome light in place.  I couldn't get all the paint off the bottom of the foam, so I decided to 'over glue.'  I'm hopeful that it makes a clean seal.  I should add for those of you who are curious, I will be insulating the 'entire' ceiling with the same foam panels.  I only added these small sections because I needed to be able to work with the wires.  Eventually the entire teardrop will be insulated and covered with the headliner.


The last project I was able to finish tonight was to put the weather stripping on the door frame.  The weather stripping was exactly the right size and fit the groove where the door rests against the wood frame.


You can see how it fits snugly against the door frame.


If you look very carefully, you can see that I added a thin gray rubber seal to the door as well.  This is way more protection than the original design.  I'm hopeful that the two parts will fuse to the metal or wood and make a tight and waterproof seal.

Next job:  getting it out of the garage.  At least now I can put it out there and not be concerned about water getting in!  

Just forgot, I still need to seal the bulkhead floor.  I keep forgetting about that because it is hard to see.  I'll try to do that tomorrow evening.  Forgot another: I need to install the rubber membrane over the hinge on the hatch.  Hopefully I can find a really wide bike tube tonight.  One more thing I would like to try to accomplish before putting the drawers and cabinets in place:   I think it would be smart to hang the spare tire from the 'floor' of the galley area where the cooler 'side' will be.  I'll use rubber washers on the bolts to keep water from penetrating through the floor.  That way it is out of the way and fairly easy to access should I blow a tire and need to get it.  Of course, by planning ahead like that, you know that my first flat will be in the middle of a snow or rain storm!

Sunday, March 31, 2013

Nearly Watertight

I spent the entire day yesterday working on the tiny parts that make up the door frame inside the cabin.  These tiny parts had to be cut, sanded, pre-drilled, primed, painted, dried and then finally installed.  This, along with a multitude of trips to the hardware store for the proper stainless steel bolts, washers and nuts took up the greater part of my day.  I decided to spray paint all of the wooden pieces to seal them from moisture.  I also painted the interior surface of the door; I chose a soft gray, which looks an awful lot like the original aluminum color. 


Erica took some photos of me installing the interior door frame trim; fun to see me inside the teardrop!


 While I had all of the bolts out, I used CLR, Brillo Pads, soap, and elbow grease to remove the rust from the hardware that had been in place for 60+ years.  My goal was not to polish, but to simply remove the rust.  However, in doing so, there were a few patches that shone so brightly that it made me smile to think about how shiny this thing will be when I finish with all the interior restorations and can properly clean and polish the exterior!

I learned how to use my rivet tool.  I was able to re-install the window hatch. The earlier owner decided to cut the hatch on the passenger side to make more room for a hinge.  I installed new hinges and was able to cover the old holes using my rivet tool.  Not perfect, but functional and pretty nice.

Both doors were painted in preparation for the screen windows.  I love how the grey looks!  I applied the seal to the door frame.  I'll need to play with the fixture that opens the hatch.  It's a pretty simple, but ingenious design.  It is nothing more than a metal rod that is used to 'push' open the hatch.  When not open, it folds back onto the frame and 'locks' the hatch.  For now I'll re-install the fixture and live with it a while before designing anything different.

Once I finish both doors, I plan on spray painting the interior of the cabin, installing bulkhead doors and flooring in the storage area, and then re-installing the tail light wiring semi-permanently.  That will basically complete the interior until I am ready to begin installing the 12v/120v electrical system and start thinking about how to insulate the cabin.

The next big project will be removing and then installing a new hatch hinge.  I've decided to take George's, from The Teardrop Fix It Shop, advice and replace the hinge.  We'll use a block of wood to 'hold' the hinge in place and to give the hatch some heft.  This should be a permanent solution.  Then I can dismantle the galley and begin renovating it.   It will be fun to start planning the design in the meantime.

Today is Easter.  I have things I have to finish to be ready for the end of the semester at NLU and to prepare to go back to school tomorrow.  I don't know if I'll be able to do any work on the teardrop today. 


Friday, March 29, 2013

Making Windows

I'm amazed at how little I 'accomplished' today.  I have created wooden door and screen assemblies.  The hardest part was getting the plywood to not 'splinter' or fray.  I later realized that I needed a much 'finer' toothed blade.  Wish I had learned this before because it would have saved me a lot of time sanding.  The screen window is two parts.  One part is 1/2" plywood and the other is 1/4".  I have to give myself credit for keeping one assembly in place so that as I worked on the replacement I could keep referring to it. 

 Above you can see one portion of the window being 'traced' as best as I could.  The old window was so brittle it broke with the slightest touch.
Here you can see the old screen window and the new one above it.  I am going to paint and seal the individual pieces before I sandwich the screen and install the new window.  


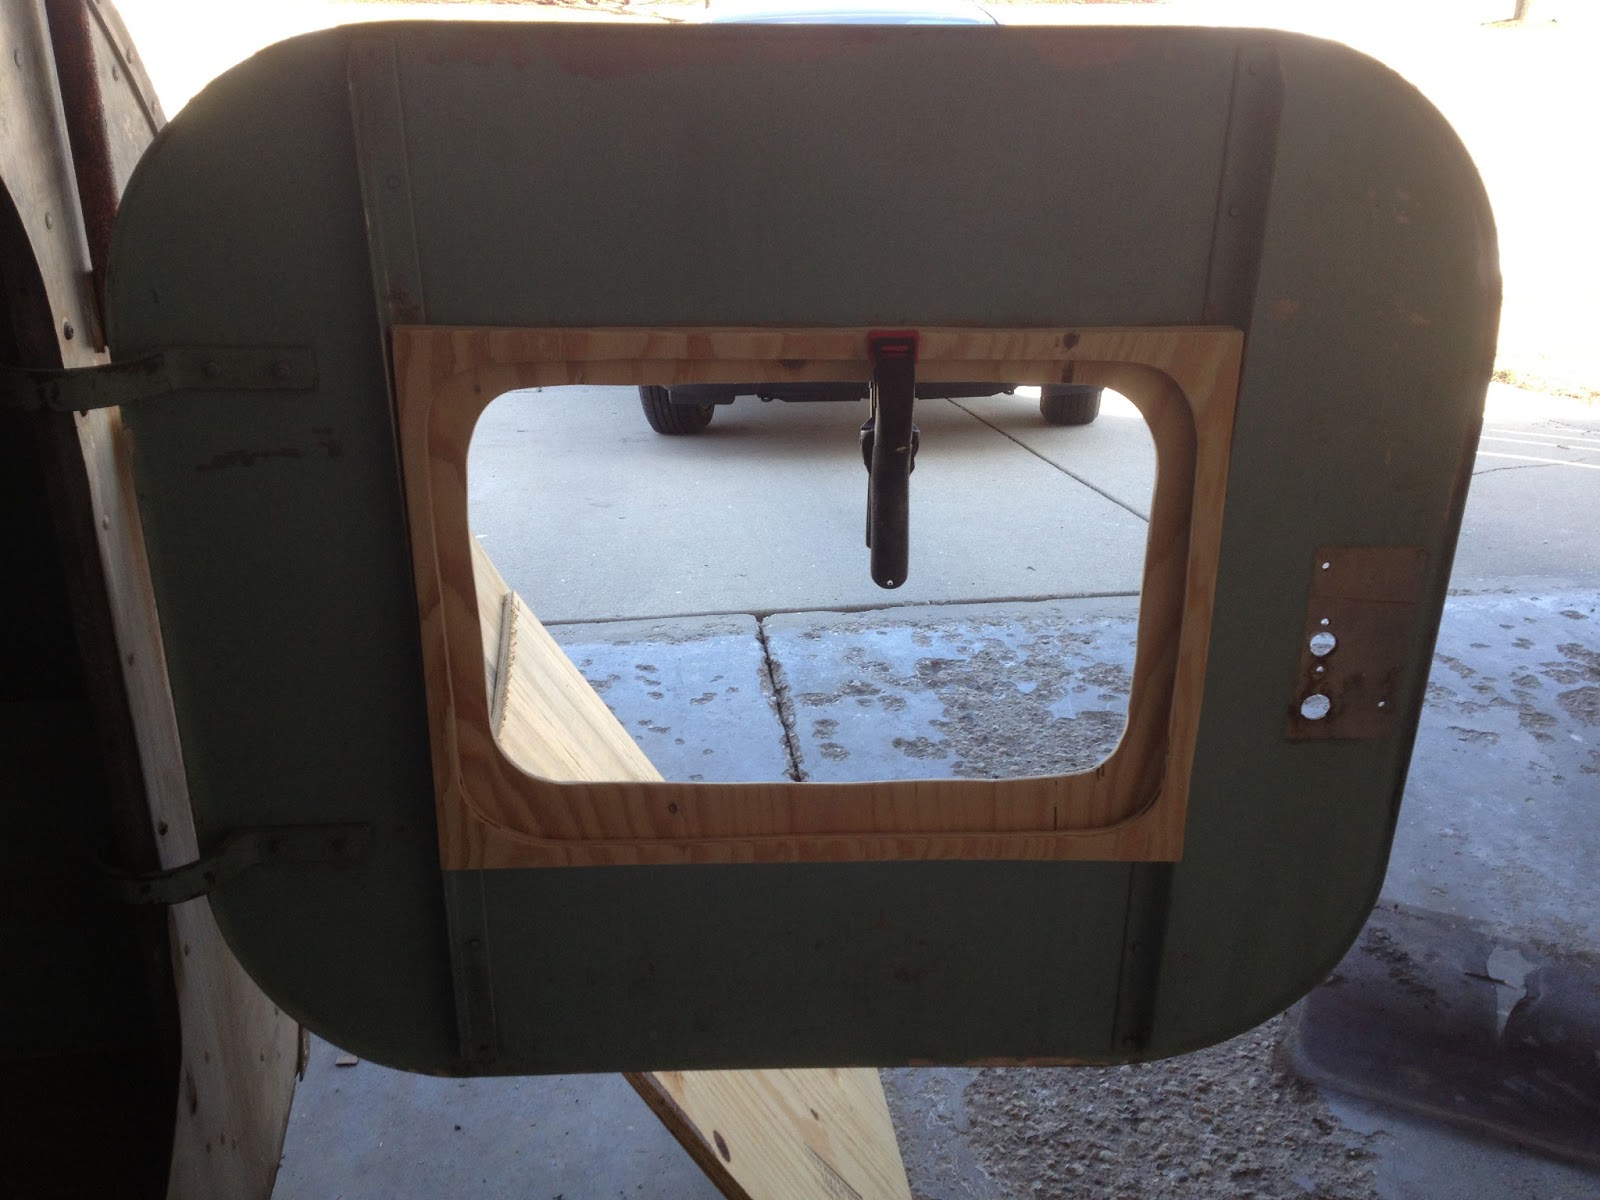
 You can see the way the screen window fits in the door.  There is a gap where foam rubber is applied to allow the window to seal when the hatch is pulled down.  I'm not terribly thrilled about the way the hatch is raised, but I haven't figured out a better system yet.  That might have to come from experimentation.

Tomorrow I'll seal and paint everything and try to get things installed.  After adding the foam insulation, the windows and doors should be water tight. 

Wednesday, March 27, 2013

Taking Stock

The past couple of days have been a chance for me to take stock of where things stand with the teardrop.  The first thing I did was clean the interior.  I went through about 10 buckets of hot soapy water cleaning the aluminum.  It was really dirty inside.  However, there were no signs of critters living in the inside.  The hatch had a boatload of caulking from various applications over the decades.  I applied a chemical that broke down the bond of the caulk and helped it peel away.

The windows were a nightmare.  The wood frames were rotten and the screen was completely rusted.  (You can see the sagging seal and the rusted screen in the image below. )  The aluminum 'cover' of the window is supposed to be hinged.  This one was completely missing, (we later found it in the cabin.)  The one on the other side had been caulked in place.  I removed all of the rotten seals as well.  I took one window frame out and left one in for reference as I begin to rebuild the wooden frame.  I will treat the 'new' frame with polyurethane to help it last a few more decades.  I considered buying a plastic framed window, but unfortunately, they are a unique size and will probably need to be specially made.  I have a window company that I would like to at least have an estimate from so that I can make an informed decision.  If it's not too terribly expensive, I think it would be worth it to have a sliding screen window.  I'd like to be able to have the light inside the cabin from windows. 

Later today, I was able to remove all of the trim along the bottom of the trailer.  I plan to replace this badly worn and broken trim with a slightly larger trim piece.  I'm looking forward to learning how to use a rivet tool.  It was a lot easier than I thought it would be to drill out the old rivets. 

You can see in this picture the old wood frame and the larger wooden frame that is used to seat the door.  I plan on rebuilding these pieces soon. 
This is the naked door with all the wood and hardware removed.
You can see by my wooden mallet all of the hardware that I removed today.  Each of those are going to be replaced by replica hardware that I've been able to find online.  It's time to start shopping for all those replacement parts!