Showing posts with label lights. Show all posts

Wednesday, May 29, 2013

Wire Test: Fail

Well, once again, I am eternally grateful to the always helpful Teardrops and Tiny Trailer Web Site.  The site has been so supportive and kind to me as I ask incredibly simple, but important to me, questions.

I had no idea that I could 'test' my trailer wiring without plugging in to my tow vehicle.  Turns out all I have to do is use the 'extra' wire harness, that came with my tail lights, to connect to my battery and I can test the functionality and success of my wiring.


The good news is that I was able to test the wiring without dragging the Carpe Diem out to the road.  The bad news is that my front running lights did not work.


Back running lights lit up.  You can see that the front light is not lit.


Another shot of the back lights. 

 Now, before I go nuts and give up, I need to perform a few more tests.  Remember I noted in my last post that those lights "...Better freaking work?" It 'could be' anything from one bad connection, to a bad ground screw.  I hope to be able to crawl under the teardrop and test things, but it will most likely have to wait.  Even though there are only six days of school left, YES I am counting, the evenings are quite busy for me these next many days.

Monday, May 27, 2013

Lots of Electric Work

Spent a lot of this past weekend working on electrical projects on the Carpe Diem.  I am not a fan of electrical work.  I would say that the stupid butt joint connectors I worked with were the main reason I detest electrical work.  I can't imagine soldering the connections that are above my head as I'm clambering around under the trailer.  I used heat shrink butt joint connectors; let's just say that the percentage of them working as planned was pretty low.

Today I worked exclusively on the trailer lights.  I should say that I worked while waiting for it to stop raining.  Even though the teardrop is jacked up, crawling around on my back on the wet pavement was less than ideal.  Except for the butt joints, everything went as planned.  Unfortunately, I couldn't test the connections today.  I'm hopeful that next weekend will be beautiful and I can pull the Carpe Diem out to the road and give it a proper test.  All I can say is, those trailer lights better freaking work!  I don't want to have to crawl under the teardrop again to make all those connections.  I took my time.  I heat shrunk and taped everything very carefully.

Last night I took some images of the teardrop's lights.  You can see that I didn't get the spare re-mounted as of the images.  I ended up throwing everything in the cabin last night.  But, the lights work!  It wasn't pitch black out, but it was dark enough to see how the light looks.


I like the LED fixture in the galley.  It swivels and throws off a lot of light. 


The porch lights are much brighter than I thought they would be.  


Night vision red dome light.

Regular dome light.


The reading lights are as bright as the the dome light; but I really like the warm iridescent bulbs in the fixtures.

Here we go.  Short week.  Already looking forward to working on the insulation of the cabin.  Happy Memorial Day!

Monday, May 13, 2013

Re-caulking, Gluing, Sealing, Screwing: Mind at Ease!

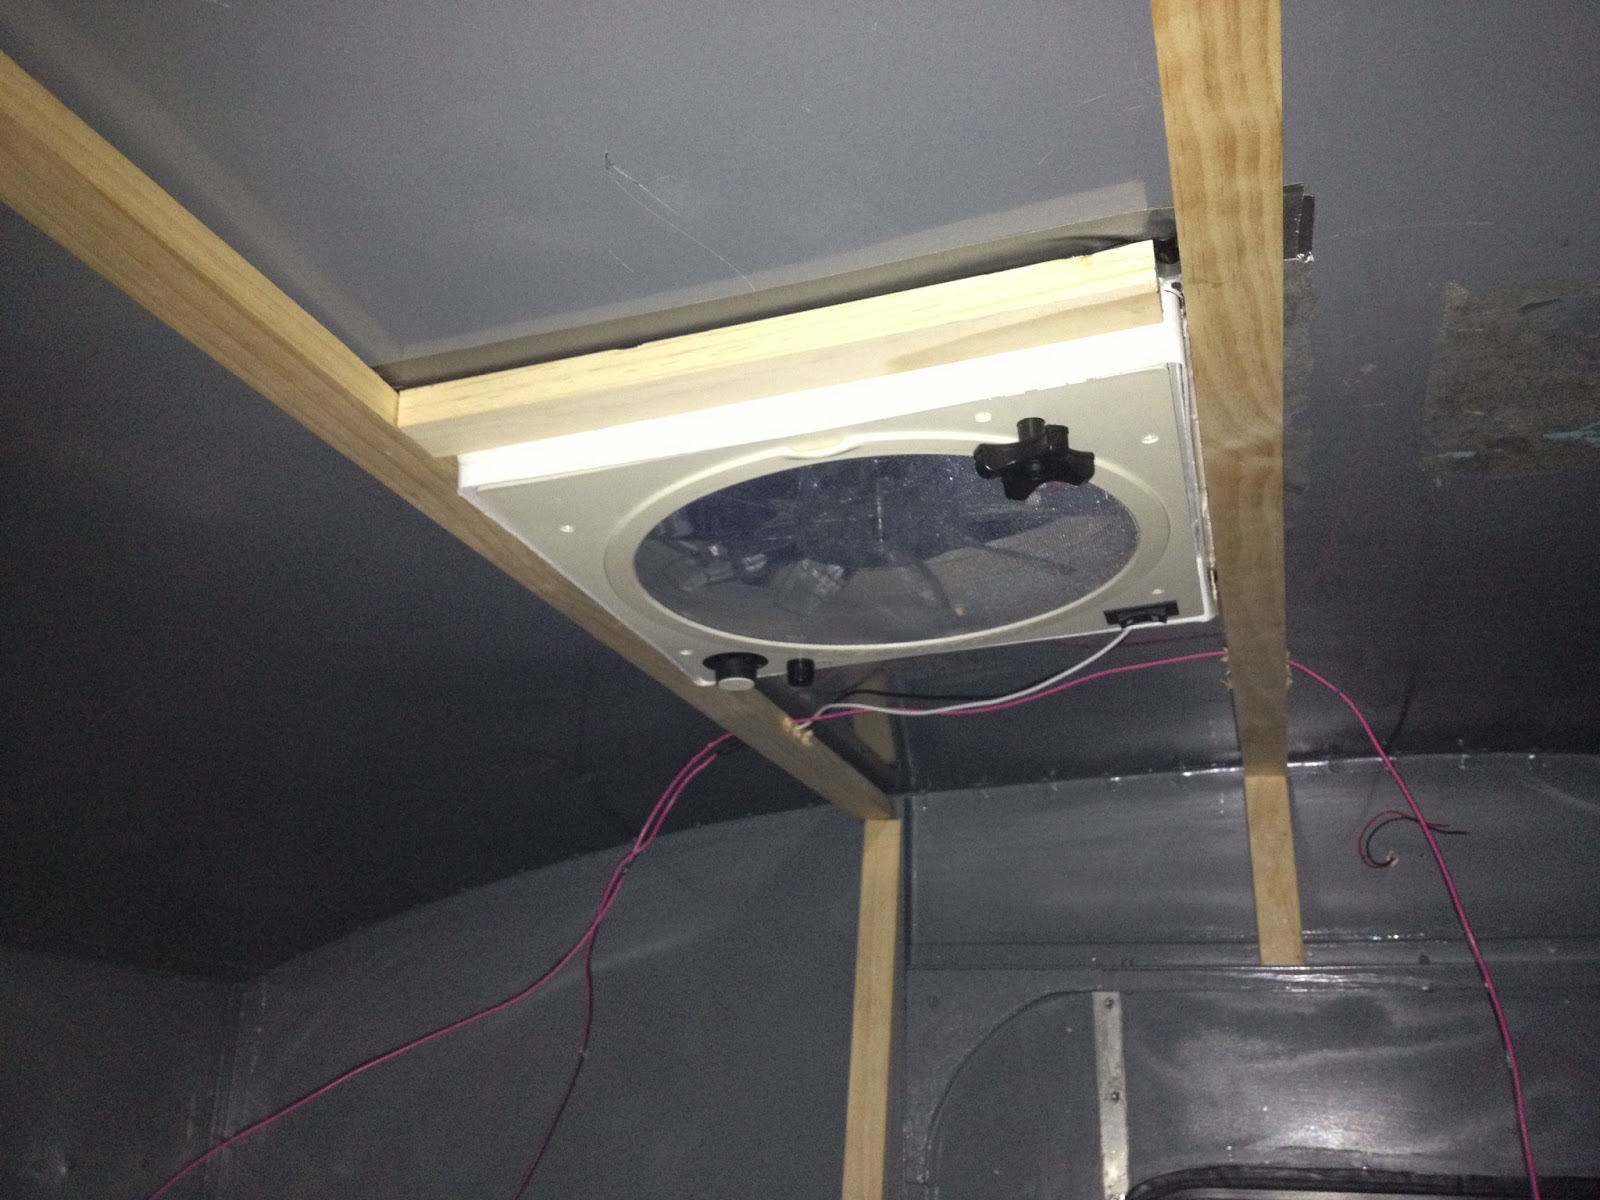
Ended up having an hour this evening to deal with my concerns about leaking. I was able to take off the wood strips I had screwed into the ceiling.  I caulked the area where the fan rests against the roof. Then I added butyl tape between the roof and the wood braces. I was able to remove the screws that had the heads broken off and put in new screws. The whole thing is drying right now. I feel much better about the fan now!


 Butyl tape and caulk applied.  Braces re-installed.


 The Fantastic Fan is now completely sealed!


Storage boxes caulked and sealed.

I also used some backer rod to cover some of my imperfections in the floor storage boxes. The  I re-caulked the gaps in the storage boxes. The last step will be to carpet the bottoms to give a little cushion and stop rattling when on the road.


 I was able to re-glue the dome light in place.  I couldn't get all the paint off the bottom of the foam, so I decided to 'over glue.'  I'm hopeful that it makes a clean seal.  I should add for those of you who are curious, I will be insulating the 'entire' ceiling with the same foam panels.  I only added these small sections because I needed to be able to work with the wires.  Eventually the entire teardrop will be insulated and covered with the headliner.


The last project I was able to finish tonight was to put the weather stripping on the door frame.  The weather stripping was exactly the right size and fit the groove where the door rests against the wood frame.


You can see how it fits snugly against the door frame.


If you look very carefully, you can see that I added a thin gray rubber seal to the door as well.  This is way more protection than the original design.  I'm hopeful that the two parts will fuse to the metal or wood and make a tight and waterproof seal.

Next job:  getting it out of the garage.  At least now I can put it out there and not be concerned about water getting in!  

Just forgot, I still need to seal the bulkhead floor.  I keep forgetting about that because it is hard to see.  I'll try to do that tomorrow evening.  Forgot another: I need to install the rubber membrane over the hinge on the hatch.  Hopefully I can find a really wide bike tube tonight.  One more thing I would like to try to accomplish before putting the drawers and cabinets in place:   I think it would be smart to hang the spare tire from the 'floor' of the galley area where the cooler 'side' will be.  I'll use rubber washers on the bolts to keep water from penetrating through the floor.  That way it is out of the way and fairly easy to access should I blow a tire and need to get it.  Of course, by planning ahead like that, you know that my first flat will be in the middle of a snow or rain storm!

Saturday, May 11, 2013

Electric and Other Stuff

So today was a mixture of many small projects.  I started wiring the trailer for electric.  I was a little intimidated by the idea of doing this.  I've had some negative experiences with electric in my house and have always ended up having the electricians come in and do it.  It just scares me too much.

So, today I started by testing out the various fixtures while connected to the battery.


Here are the two main interior fixtures, the dome light and the reading lights.  The first thing I had to remember is that sometimes fixtures come with different color wires.  Both of the above fixtures had white and black wires.  I just had to remember that black was hot on those fixtures.  I then connected the red wires to these terminals and all was good.  I was so happy to see both light fixtures actually light up!  Then I decided to wire the interior lights together to put them on one circuit.


The reading lights have a recessed connection, so they had to be installed onto a block of wood.  This then was screwed to a piece of hardboard, which was glued to the foam.  It all should work out smoothly for me when it comes time to cover it with the headliner.  I'm hopeful that I can put that section on in one large piece.


Here you can see how I braced the foam to the roof.  Using these planks of wood worked pretty well.  I used Gorilla Glue for the first time.  That stuff is interesting.  It's kind of like working with the extruded foam; it actually looks like that when it dries.  It also 'expands,' which regular glue does not do in the same way.


Here you can see the small pieces of hardwood that are glued to the foam.  This gave me something to 'screw' into for each fixture.


Here are the fixtures mounted onto the hardboard and foam.  You can see the channels I cut for the wires.


You can see the hole coming in from the cabin.  I just got plain lucky that the shelf in the cabin was at the same height of the counter top in the galley.  I was able to tuck the wires into the power center area very easily.


This is the hole going into the power center.


You can see how the fuse panel will fit into the side wall there.


Here you can see the two 12 volt power port holes and the small square hole is where the 12 volt battery meter will be placed.  I decided to use two steel boxes.  One will potect the back side of the 12 volt outlets and the other will be for the one 120 volt outlet that I will install after I put the power port entry hole on the outside of the teardrop.


Another big task was putting the original hinge back on.  You can see on the image above that I used the butyl tape to seal the top part of the hinge.  I then screwed into a 1" by 1".  This gave the hinge something to 'bite' into and I think allowed me to really tighten the hinge.


These clamps worked well to hold everything where I wanted it while I was screwing it in place.


Here is the 'porch light.'  These will be tied into the four small LED lights, one on each corner too. 


They will all come to a central switch on the shelf area.  I can't wait to see how these are going to look at night!


Everything worked!  I shouldn't have been surprised, but given my history with electricity, I was!  I had not had the chance to 'sit up' and use the reading lights before.  I found that leaning against the bulkhead, which is headliner covered foam, was very comfortable and the lights will work perfectly!

I thought I had done something wrong with the vent.  I couldn't get it to turn on.  Then I realized that you have to have the vent hood open for it to turn on.  It is quiet and truly moves a ton of air around.  It isn't too noisy, but just noisy enough to work for us as a white noise creator.

I also was able to fix up the drawers and doors.  I had done a poor job on their fronts.  I routed the edges of the doors and sanded their fronts properly.  

One of the last projects was installing the new screw/bolts that hold the struts in place.  These struts hold up the hatch.  It was amazing to me how much a small bag of stainless steel hardware can cost.  

Tomorrow I have to get the second half of the hinge installed and the vent and doors sealed up so that the teardrop can go out onto the concrete patio.  

Sunday, April 7, 2013

Cabin Thoughts

I've been contemplating some design concepts for the cabin.  Originally I planned to insulate and then cover the insulation with a thin skin of Luan.  One of the large considerations of this plan was that the doors are such a significant portion of the side of the cabin that 'skinning' them has some potential challenges that may make it incredibly difficult.

After some exploration and brainstorming with Jim, I've come up with a hybrid plan that I think will help make the interior finishing quite a bit more simplified.

I am thinking that I will still add the foam to the ceiling.  I will cut 'channels' in the foam to carry my wiring for the ventilation fan and ceiling lights.  Rather than put the foam on in one large sheet, I'll use 1" strips of wood every 24."  This will allow me to have 'something' solid to screw the plywood into.  I will then use a product, I mentioned way back in my original planning stages, called a headliner.  I found a product at Kendor Marine's online site.  It is perfect.  It is a mold proof, heavy duty marine grade 'carpet'-like product.  It has a rubberized backing (which is apparently unique).  I will add this, not only to the ceiling, but also to the aluminum skin walls.  I won't add any additional insulation panels however to the walls.  Here is a link to this product.  This will do many things.


1.  It will provide just a bit of 'cushion' when you bump into the aluminum wall.
2.  It will soften the interior of the cabin; deadening some of the bouncy sound that exists in it with just the aluminum skin.
3.  It will be tremendously easier to complete the interior of the cabin.
4.  The headliner will help insulate against heat and cold.

One of the things that made this work in my mind was the great find on their website of the dual reading lights that can be mounted on the ceiling.  In doing this, I eliminated the need to have wiring run to the side cabin walls, where I had planned on installing some chrome reading lights.  All of the wiring can be run in the ceiling.  Here is a link to this fixture.

(Just found out that their online store's warehouse is in Racine.  This will save me $40 in shipping.  I ordered the headliner and cabin light and will pick up later this week.)

I found a terrific deal on the LED light I will install on the hatch.  This light will swivel 180 degrees which will be perfect for when the hatch is up.  I'll be able to swivel it to cover the galley area, but also it can swivel to light up the picnic table if needed!  Plus, the one below is over 18" long.  This will provide plenty of light.  Here is a link to this fixture.

I may even add the headliner material to the underside of the hatch.  This will add a nice finished look to the hatch when it is lifted.  Here is a link to those fixtures.
Super Bright LED's had the LED Swivel light and the above 'porch lights' that I will install above the door to light the way when returning from the bathroom, etc.  (I ordered two more to put in the galley.  I intend to have them in the back as night vision lights for that area too.) They had tremendously reasonable prices.  I also found the marker lights below.  I want to use one of each color on the sides of the trailer.  The chrome will look awesome on the side of the trailer.  Here is a link to these marker lights.